Sunday, May 5, 2013

How to use Sencha Touch 2 in Eclipse with Auto Complete feature.

We know Sencha Touch 2 is going to be a promising frame work for cross platform mobile app development. Inspite of the greate Sencha SDK provided, it's a pity that they do not provide Sencha Architect (the ultimate Sencha Touch IDE) for free ! Here I discuss how we can use Sencha in our old friend Eclipse. One thing I wanted for a while was to have the auto complete feature for Sencha API in Eclipse. Even though Googled, resources and the instructions provided  in other articles are obsolete by the time I write this. After few days I realized a way that I can enable the auto complete feature in Eclipse for Sencha Touch 2 and thought to share my experience with you, who might be desperate as I was.

Prerequisites :

Sencha SDK (used here : sencha-touch-2.1.1)
Sencha Cmd (used here : Sencha Cmd 3.1.1)
An Eclipse IDE (used here : Kepler: Eclipse Java EE IDE for Web Developers)

How to Open & Run a Sencha Touch app inside Eclipse

  • Create a Sencha app skelton using sencha cmd (I have discussed this in my previous post).
  • Then open Eclipse IDE and go to File menu -> other -> general -> Project
  • Give a Name to the project and dis-select the 'use default location' option and browse and provide the Sencha app skelton folder we created previously.


  • Configure the Tom Cat server in Eclipse.
  • Run the app in the server mode.   
  • If everything works fine you'll be able to view your running app at 'http://localhost:8080/<your sencha app name>/' (port number might defer according to the server configurations if its not the default) in the chrome browser. (since Sencha Touch is a JavaScript application framework developed for mobile web applications development, it supports only web browsers built on Web Kit. So you must use Chrome or Safari for testing on desktop PCs)

Enabling the Auto Complete feature for Sencha Touch 2

  • In the Eclipse IDE go to Help -> Install New Software and click Add button.
  • On the Name field type 'Spket' and for the location type 'http://www.agpad.com/update/' and click Ok button. Spket is a free toolkit for Java Script and it provides a plugin for Eclipse. (http://www.spket.com/)


  • Select all the components and click 'Next'.

  • Click Next again.

  • Select 'I accept the terms ... ' and click 'Finish'.

  • Wait a while till Spket gets installed and at the middle it may give a security warning, then press "OK". At the end it will prompt you to restart Eclipse, and please do.


Setting up Sencha Touch2 for auto completion

  • Now go to Ecplise IDE and go to 'Window' -> Prefernces -> Spket -> Editors -> Java Script Profiles, and click New.
  • Type 'Sencha Touch' and click 'Ok'.
  • Select 'Sencha Touch' from the library and click on 'Add Library'.
  • Select EXT JS.
  • Select the second 'ExtJS' option and click 'Add File'
  • Select touch.jsb3 file saved in Sencha SDK and click 'Open'.
  • select all components and select the first 'Sencha Touch' node and click 'Default' and press 'OK'.
  • Now within the 'preferences' window select General -> Editors -> File Associations and select '*.js' fro the list. Under the Associated Editors list select 'Spket Java Script Editor' and click 'Default' button and click 'Ok'.
  • If everything happened smooth you should now be able to try out auto completion feature for Sencha Touch 2 in eclipse. Type Ext. and press (ctrl + space) voila!    
Note: for Mac users this post might be helpful despite of touch.jsb3 file.
If you are interested you can even have this capability in Aptana or Titanium : refer this

Tuesday, March 26, 2013

Generating Sencha Touch 2 App Skeleton

After long time I'm back to the blog. It's not because I'm free, in fact I'm busy than ever but thought to share how to generate app skeleton via Sencha Touch CMD since I don't wanna see some one else get into the same difficulties I got in to.

For your reference here's the official site for doing just this. But I bet it wont help a lot. For this for now you need all 3 below to be already installed.

1. Java Run Time Environment  JRE
2. Sencha CMD (this provides commands for us to generate the app skeleton, etc)
3. Sencha Touch 2.1.1 SDK


Ok here are the quick steps...

Step 1:
During the Sencha CMD installation it should add it's path to the environment variables automatically, but if not please do as follow.
Add the Sencha CMD path (path/to/the/sencha_cmd_installation_directory,  for example: C:\Users\Madusha\bin\Sencha\Cmd\3.1.0.256) to the Path variable in the environment variables in your Windows OS.
If it's been added successfully you should get an out put like below depicting about the version and other command menus if you type 'sencha' in the command prompt.


If the path is not set properly below Warning message will pop out.


Step 2:
You then just have to type below to generate the app skeleton.
sencha -sdk "path/to/sencha_sdk" generate app yourAppName "path/to/the/appfolder"

The app folder will be created automatically. But remember you MUST need to have double quotes when you provide the path to sencha sdk.


Note: If you can not set path of Sencha CMD in the path variable then navigate to the   sencha_cmd_installation directory via command propmt and proceed with the Step2.


Good Luck !

Saturday, July 16, 2011

Couldn't retrieve cell value in Excell by apache POI

Look at the below code,

-------------------------------------------------------------------------------------------------------

import java.io.FileOutputStream;
import java.io.IOException;
import org.apache.poi.hssf.usermodel.HSSFCell;
import org.apache.poi.hssf.usermodel.HSSFWorkbook;
import org.apache.poi.ss.usermodel.Cell;
import org.apache.poi.ss.usermodel.CellStyle;
import org.apache.poi.ss.usermodel.FormulaEvaluator;
import org.apache.poi.ss.usermodel.IndexedColors;
import org.apache.poi.ss.usermodel.Row;
import org.apache.poi.ss.usermodel.Sheet;
import org.apache.poi.ss.usermodel.Workbook;

public class test {

    public static void main(String[] args) throws IOException  {
        // Create a workbook
        Workbook workbook = new HSSFWorkbook();
        // Create new sheet for workbook
        Sheet sheet = workbook.createSheet("Sheet one");
        // Create row at 3
        Row row = sheet.createRow(3);
        Row row2 = sheet.createRow(4);
        Row row3 = sheet.createRow(5);


        row.createCell(7).setCellType(HSSFCell.CELL_TYPE_NUMERIC);
        row.getCell(7).setCellValue(276.89);

        row2.createCell(7).setCellType(HSSFCell.CELL_TYPE_NUMERIC);
        row2.getCell(7).setCellValue(500);
        row3.createCell(7);
        row3.getCell(7).setCellFormula("SUM(H4:H5)");

        row.createCell(8).setCellType(HSSFCell.CELL_TYPE_NUMERIC);
        row.getCell(8).setCellValue(row3.getCell(7).getNumericCellValue());

        // Write the output to a file
        FileOutputStream fileOut = new FileOutputStream(
                "test.xls");
        workbook.write(fileOut);
        fileOut.close();

    }

}

-------------------------------------------------------------------------------------------------------

out come of above code


In the above created test.xls you will notice that the sum value 77.89 is displayed as 0 in cell I4 though I called row3.getCell(7).getNumericCellValue() method.
Later I realised that its because that cell H6 is i used here as a cell with a SUM formula. So I need to evluate it's value first before I get its value.
Finally the amended code is as below. 

-------------------------------------------------------------------------------------------------------

import java.io.FileOutputStream;
import java.io.IOException;
import org.apache.poi.hssf.usermodel.HSSFCell;
import org.apache.poi.hssf.usermodel.HSSFWorkbook;
import org.apache.poi.ss.usermodel.Cell;
import org.apache.poi.ss.usermodel.CellStyle;
import org.apache.poi.ss.usermodel.FormulaEvaluator;
import org.apache.poi.ss.usermodel.IndexedColors;
import org.apache.poi.ss.usermodel.Row;
import org.apache.poi.ss.usermodel.Sheet;
import org.apache.poi.ss.usermodel.Workbook;

public class test {

    public static void main(String[] args) throws IOException  {
        // Create a workbook
        Workbook workbook = new HSSFWorkbook();
        // Create new sheet for workbook
        Sheet sheet = workbook.createSheet("Sheet one");
        // Create row at 3
        Row row = sheet.createRow(3);
        Row row2 = sheet.createRow(4);
        Row row3 = sheet.createRow(5);


        row.createCell(7).setCellType(HSSFCell.CELL_TYPE_NUMERIC);
        row.getCell(7).setCellValue(276.89);

        row2.createCell(7).setCellType(HSSFCell.CELL_TYPE_NUMERIC);
        row2.getCell(7).setCellValue(500);
        row3.createCell(7);
        row3.getCell(7).setCellFormula("SUM(H4:H5)");


        FormulaEvaluator evaluator = workbook.getCreationHelper().createFormulaEvaluator();
        Cell cell2 = row3.getCell(7);
        evaluator.evaluateFormulaCell(cell2);

        row.createCell(8).setCellType(HSSFCell.CELL_TYPE_NUMERIC);
        row.getCell(8).setCellValue(cell2.getNumericCellValue());

        // Write the output to a file
        FileOutputStream fileOut = new FileOutputStream(
                "test.xls");
        workbook.write(fileOut);
        fileOut.close();

    }

}

-------------------------------------------------------------------------------------------------------

out come of above code


Resources :

Friday, July 8, 2011

How to merge two html files and render as a one html

Hmmm it took a little while for me to google and find a good way of doing so.
I was fortunate enough to get to know about iframe tag in html.
But putting two iframes didn't satisfy my need. The two frames render on the left and right side of the final .html. But I wanted to show them downwords. A friend of mine suggested to use <div> and it worked.
But there was another issue. The two frames did not fit into the screen. for that i had to use style attribute.

So here's the final html code that did the trick.
The code explains itself what has happen, better than me saying it in words.


<div  >
<iframe src="http://www.google.lk/" scrolling="no" frameborder="0" style="width:100%; height:80%;"></iframe>
</div>
<div >
<iframe src="http://modernmerlins.blogspot.com/" scrolling="no" frameborder="0"  style="width:100%; height:250%;"></iframe>
</div>


put the above code in a .html (give any file name and let the file extension be .html ) file and open it up in a browser.... hurry do and see how cool it is. (figure 1)

Note: you can use any html file instead of the links given for src in the above code.

figure 1


Saturday, February 19, 2011

RMI for FUN … 

This tutorial is not for an experienced individual who needs to know the pros and cons in RMI. This I write for anyone who likes to get a quick brief look up in to RMI. Let me explain in simple English what it does as this I write for a beginner who is just as I am ….

What is actually RMI (Remote Method Invocation)
We use RMI to invoke methods of an object that resides in another memory heap (another machine) through a network …. Just think how cool that would be.
And Oh yes we are just going to write a simple code for a simple scenario and see for ourselves …

What I want to do (scenario) :
Think that we need to monitor the current state (wind speed, wind direction and many more other data) of each wind turbine in a wind mill farm…. In every turbine, we have an application that maintains its own state and we from another location needs to monitor the state of each turbine REMOTELY...


Ok here's the code that how I do this... (will discuss after showing the artifacts)

Class diagram that depicts the server side


At the Wind turbine side (server side) ...

import java.rmi.Remote;
import java.rmi.RemoteException;

public interface RemoteWindMill extends Remote{

    public String getStatus() throws RemoteException;

}

-------------------------------------------------------------------------------


import java.rmi.registry.Registry;
import java.rmi.RemoteException;
import java.rmi.registry.LocateRegistry;
import java.rmi.server.UnicastRemoteObject;
import java.util.Date;

public class WindMillImpl implements RemoteWindMill {

    public WindMillImpl() throws RemoteException {
    }

    public String getStatus() {

        return " Wind Turbine no 001 : "
                + " \n location = Puttlam Srilanka"
                + "\n Time = " + new Date()
                + "\n Coordinates = 06'08''46'''N 81'06''47'''E"
                + "\n Model = M1500"
                + "\n Hub Height = 46m (151 ft)"
                + "\n Rotor Diameter = 43m (141 ft)"
                + "\n Wind Speed = 40kmph "
                + "\n Wind Dirrection = west to east ";


    }

    public static void main(String[] args) {

        try {
            WindMillImpl mill = new WindMillImpl();
            RemoteWindMill stub = (RemoteWindMill) UnicastRemoteObject.exportObject(mill,0);
            Registry registry = LocateRegistry.getRegistry();
            registry.rebind("RemoteWindMill", stub);

        } catch (Exception e) {
        }

    }
}

-------------------------------------------------------------------------------

At the monitoring side (client side) ...


import java.rmi.registry.LocateRegistry;
import java.rmi.registry.Registry;

public class WindMillMonitor {

    public static void main(String[] args) {
        new WindMillMonitor().monitor();

    }

    public void monitor() {

        try {
            System.out.println("Trying to call the remote method");
            Registry registry = LocateRegistry.getRegistry();
            RemoteWindMill mill = (RemoteWindMill) registry.lookup("RemoteWindMill");
            String s = mill.getStatus();
            System.out.println(s);

        } catch (Exception e) {
        }

    }
}

------------------------------------------------------------------------------- 

You can download the source code from the below link :
http://www.sendspace.com/file/a9z3sq

-------------------------------------------------------------------------------


In order to run the system..


step1: start rmiregistry in serverside

 step2: run WindMillImpl in serverside


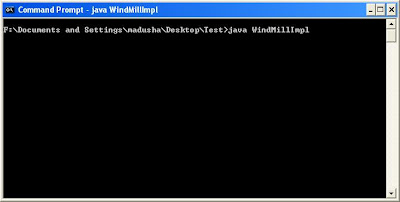
step3: run WindMillMonitor in client side 


What we are really doing here is we are creating something called a stub which adheres to the interface of the RemoteWindMill and assign it in a registry. This stub is the one that is responsible to commuinicate through wires remotely and we don’t need to care about its content because UnicastRemoteObject.exportObject() will create and assign the stub in a registry for us.  This registry is almost like the white pages of a telephone directory where we find the address of a residence that having the phone number we search for.    Ok here’s a small diagram that depicts what I was talking…


In the diagram,

  1. WindMill monitor will check for the stub in the RMI registry which resides in another VM. LocateRegistry.getRegistry(String host, int port) in the WindMillMonitor class is responsible for this. Here we don’t specify the IP address of the WindMillImpl hosting machine or the port which WindMillIImpl will be listening as the arguments of the method because this application was written to run on the same machine just for you to get an idea how this RMI really works.
  2. Then by invoking registry.lookup("RemoteWindMill") it will search for the RemoteWindMill stub that has already been assigned to the RMI registry in the other VM. And a copy of  that stub is sent to the client side VM. The client sees a stub in it’s VM as almost like a WindMillImpl object because stub adheres to the RemoteWindMill interface.
  3. So that the client will directly be talking to the stub thinking it’s the RemoteWindMillImpl object. But under the covers it’s the stub secretly calling the real RemoteWindMillImpl object residing in another VM via a cable.

Resources: 

      Sunday, February 6, 2011

      How to avoid your desktop being idle, while you are not at the seat


      As the title implies the aim of this project was to create a small app to make the desktop mouse move continuously for a specified time while you are away from the PC.

      How to use the app

      Below figure 1.1 shows a snap shot of the app. As you can see you can specify time duration in minutes (integer value) in the empty text field and press start to make your mouse move !!! …  You can only type digits on that text filed and if you try to add any characters in it, it will discard the characters instantly as you press the character key. You are not permitted to start the app while the text field is empty. If so the app will pop out a warning massage (figure 1.2) and will wait till you specify time duration in minutes.The progress bar will show how much time left for the app to continue. After the specified time is over the app will destroy itself giving the user full freedom to use its mouse again.


      Figure 1.1 : Robo_Mouse App

      Figure 1.2 : Warning massage 

      It should be noted that after you start the app it takes the control of the mouse over from the user, and if you want to stop it, you can’t use the mouse now as it’s currently handled by the Robot Mouse app.

      How to stop the running app

      If you want to exit from the app before the app exits by itself simply press Alt and f4 keys together (Alt + f4).  If that doesn’t work for some reason go to task manager and kill the app. If something extremely goes wrong  as with most other apps restarting your machine will end up the controversy. (As this is just a simple program that has been written for my own interest I won’t take responsibility for any issues arise regarding any damage done to any PC or any electronic device).


      Lessons I learnt from this…

      In order to display time in every second three main distinct methods of coding been experimented.  Priority was given to the code that can use less objects and consume lesser memory space. Because its been assumed that this app would be used while there are important apps running on the machine.

      As the application should run for a user defined time interval , the app should be using the memory  cleverly, otherwise creating many date objects for getting the current time would end up with lots of garbage in the heap. In order to monitor the memory consumption for the selected three alternative methods for updating time, I ran them separately in a while loop for 100000 times.

      code snippets for three methods I experimented with are as follows..

              // method 1 ...

              int i = 0;
              Date d = null;
              Calendar c = Calendar.getInstance();

              while (i < 100000) {

                  d = new Date();
                  c.setTime(d);
                  c.getTime();
                  i++;

              }

      -----------------------------------------------------------------------------------------------------

             // method 2 ...

             int i = 0;
             Calendar c = Calendar.getInstance();

              while (i < 100000) {

                  c.setTimeInMillis(System.currentTimeMillis());
                  c.getTime();
                  i++;

              }

      -----------------------------------------------------------------------------------------------------        
              
              // method 3 ...

              int i = 0;
              Calendar c = Calendar.getInstance();
              SimpleDateFormat formatter;
              java.util.Date utilDate = null;

              while (i < 100000) {

                  int year = c.get(Calendar.YEAR);
                  int month = c.get(Calendar.MONTH);
                  int day = c.get(Calendar.DATE);
                  int hour = c.get(Calendar.HOUR);
                  int min = c.get(Calendar.MINUTE);
                  int sec = c.get(Calendar.SECOND);


                  String date = year + "/" + month + "/" + day + "  " + hour + ":" + min + ":" + sec;


                  try {
                      formatter = new SimpleDateFormat("yyyy/MM/dd hh:mm:ss");
                      utilDate = formatter.parse(date);

                  } catch (ParseException e) {
                      System.out.println(e.toString());

                  }

                  i++;

              }
          }


      -----------------------------------------------------------------------------------------------------


      The results were significant…

      Method for updating time
      Used Heap  (Bytes)
      Method 1
      4,155,904 (depicted in figure 2.1)
      Method 2
      4,222,864 (depicted in figure 2.2)
      Method 3
      4,107,760 (depicted in figure 2.3)


      Figure 2.3
      Figure 2.1
      Figure 2.2

      It’s been evident & confirmed that creating Date objects in every loop seems costly in the methods. In method 1 creating Date objects was straight forward. In method 2, Date objects been created implicitly by the c.getTime(). I would rather so thank full to anyone who can give a far more better way of dealing this scenario avoiding creating Date objects. As you can see in the code snippets all those anonymous Date objects will be floating in the heap till GC (garbage Collector) collects them.

      Resources :
      http://www.odi.ch/prog/design/newbies.php
      http://netbeans.org/download/magazine/01/nb01_profiler.pdf


      you can download the source codes or the app from here ...
      If you need to only run the app just download the below .jar file and double click it to execute...

      Source codes : Source Codes of Robot Mouse
      Robo_Mouse App (Robot_Mouse.jar) : Download RobotMouse App